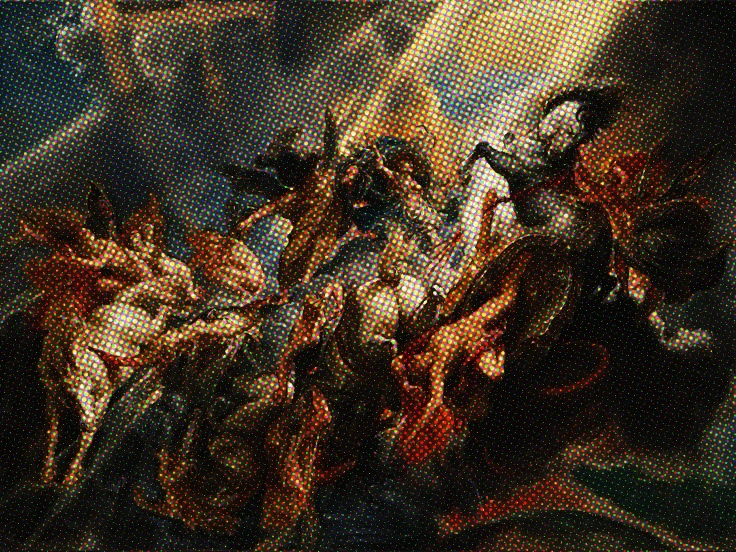
Halftone is how printers show tones with one ink. Dark areas get big dots, light areas get small ones, and from a distance your eye blends them into a picture. Look closely at a comic or an old newspaper and you see it right away. It is one of the quickest ways to give a photo a graphic, printed feel.
Add the halftone effect
- Open your image or video in Dasca.
- In the Effects library, search for Halftone and click it.
- Press C to switch between the result and the original.
By default you get color dots split into CMYK plates, like a real print.
Pick the screen
Mode sets the shape:
- Dot for comics and pop art.
- Line for an engraved or TV-like screen.
- Cross for a rougher, hand-printed feel.
Cell Size sets how big the dots are. Small cells look like a magazine, large cells look like a poster seen up close.
Color or one ink
- With Color Split on, each ink gets its own screen angle, like four-color print. Turn it off for one even screen.
- Invert switches from ink on white paper to glowing colored dots on black.
- Contrast shapes the tones before the dots are drawn. Raise it when the picture looks flat.
- Mix blends the dots with the original. Lower it to keep some photo detail.
You can also turn the screen with the Angle handle right on the canvas.
Two-color prints with Risograph
For zine and gig poster looks, use Risograph instead. It prints with two to four spot inks on colored paper, with each ink slightly out of place like a real stencil print.
Start with a preset:
- Duotone Zine for black and pink.
- Riso Classic for teal, orange and burgundy on cream paper.
- Neon Punk for loud colors and strong misregistration.
Go further
- Hatching draws the tones with ink lines, like an engraving.
- Dither with the Halftone Dot matrix gives a sharper, pixel-exact dot screen.
- See every control in the halftone docs.
Export as an image for posters and covers, or as MP4 or GIF if your source is a video.